Friday, June 29, 2012

Racerback dress for Miss C

The more confident I become in my children's clothing abilities the more willing I am to sew clothes for other peoples kids.  I have a good friend who had her first baby earlier this month and I am finally going to meet her this weekend!  I have been sewing up lots of fun things for her, I just love babies!  

Last month Crafterhours posted this adorable Racerback dress and I knew I would be making one soon!  I made the 12-18 month for Miss C to wear next summer and decided she would need a diaper cover to match.  I have used Dana's before over at Made and then added some fun ruffles because, well ruffles make everything cuter!  For the headband I used this tutorial but found that 3 layers of each flower size were WAY to many for a baby headband so I used just one of each and that was much better.  


The back of the dress.


I really liked the racerback dress, it sewed up quickly and is a good basic dress.  The back makes it fun.  I only have two areas that I will change next time.  First, I will say is that I think it is a bit short for my tastes.  I think for babies it is probably fine but for my long legged 4 year old, I'll add a bit to the bottom.  Also I think the neckline is pretty high too.  I'll be posting the dress that I made for Peyton soon and I'll share how I adjusted for that.


What I LOVE most is adding a tag!  I am starting to tag all my clothes with the size.  I'm using twill tape and a stamp set.  Someday I am sure I'll have personalized labels but for now this is a great place to start.


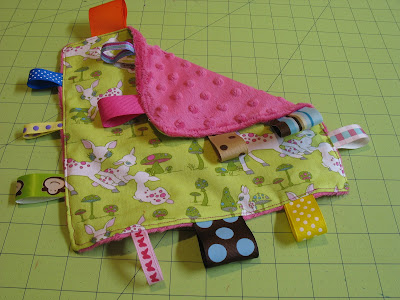
Of course I threw in one of my well loved crinkle ribbon toys.  :)  I hope Mamma and Miss C are pleased!  Happy Friday!

Thursday, June 28, 2012

McCalls Pattern Review

Well I've been doing a lot of sewing recently!  It is just so fun and helps to feed my creative need!  I made this dress earlier this spring but wanted to share it before I get into posting all of the new things I've been making.  It is a McCall's pattern number M6497.  I am not much of a major pattern buyer, mostly because I can find so many fun things to make just by visiting blogs but this one jumped out at me while at JoAnn's and it was a $1, so into my cart it went! :)


As I thought about what fabrics I wanted to use for this dress I decided to try and use some of my ever growing stash!  I found a fat quarter of the print on the top with the big pink flower and decided to use that as my direction.  (by the way it is from the City Girl line by Kitty Yoshida manufactured by Benartex and is a few year old)  Going with that I found other fat quarters (5 total)  in purple/pink which is the color scheme my daughter in into right now (like pretty much all the other 4 year old girls I know).  I was hoping they would work for the rectangles even though the directions have you using yardage to cut the rectangles.  They do!!  

I made a size 6 and the rectangle for the upper ruffle layer is 6 1/4" x 5 3/4" and the lower rectangle is 11 1/2" x 9".  I did have to get a bit creative and buy the grey dot (which I was reluctant about because I wasn't sure it would work) and deep purple to help me get enough fabric and then I had to make up my own order and for the squares in the ruffles so as to not have rectangles side by side of the same print; but it can 
work! :)  I did have the pink leaf fabric used in the bodice already and it is my least favorite fabric in the dress.  


I think what I most appreciate about this is the details, I love the added lace bits on the bodice and in the skirt.


Here is the back view.


It is an amazing twirling dress with a very full skirt!


 In summary, I basically used the pattern just for my pieces and directions and then made the fabrics I wanted to use work! :)  It wasn't a complex dress just time consuming since I had to do it my way!  Just how  I always do! :)


Feel free to leave me a comment or even better follow me!  It would make me super duper happy! 
Just Sayin'.  Have a great day!


Tuesday, June 26, 2012

Buttermilk Pancakes


I know it is summertime and it is hot, but last weekend I was craving pancakes!  While you can certainly whip them up with Bisquick or your favorite recipe, these might be a nice chance of pace.  It makes a flatter and less fluffy pancake than Bisquick pancakes and they're more moist too!


Do you want to try?  They look pretty good right? :)


Buttermilk Pancakes
3 C. buttermilk
1 1/2 tsp. soda
1 tsp. salt
1 (1/2 cup) stick margarine- melted
4 eggs beaten
2 C. flour (this is a rough amount, it can be a bit more or less depending on the consistence of the batter.)

Bake on Hot griddle around 350-375 degrees  To reheat the leftovers I put them in the toaster and they warm back up nicely without getting soggy.

I am pretty sure everyone can make pancakes but I thought I'd mention a few things that I feel help with the recipe.  


As I mentioned the consistency is pretty thin. It should pour easily.


It is kind of hard to see here but they don't raise much.  I can tell when it is time to flip them by the bubbles.


YUM!


I like them with syrup but my daughter and husband prefer strawberry sauce.  The sauce we like is homemade using this great recipe I mentioned in this post.  Enjoy!

Monday, June 25, 2012

Striped Maxi Skirt

I have always been very shy about sewing clothing for myself.  It just seems hard!  There isn't really anything else I am afraid to tackle, but sewing for me.  However when I see tutorials and blog posts like some of these, Made by Rae wiksten top, Milkmaid Skirt by Crafterhours, and even this etsy skirt makes me swoon!  I really want to try since I am so annoyed sometime shopping for myself.  I find the more I sew the less happy I am with what I find in stores for me and the kids.  So I decided to try something easy, like a maxi skirt.  I saw this maxi skirt on pinterest first, which I loved!  But decided to use the most basic of her tutorials to start with!  

Here are the 2 pieces you need.  The yoga band waist piece (cut 2) and the bottom (cut 2)


The most time consuming part was actually the cutting and getting the fabric to lay nicely before cutting.  I sewed it together quickly with my serger and only had one issue.  I cut my waist band a bit too big and it wouldn't stay on my waist. Since I have made this error before on a skirt for my daughter, I added a piece of elastic inside the waist band to hold it up.  It works, but I'll know next time to cut that waist piece as small or smaller than her tutorial directs.  


 I think it turned out pretty good for a first try!  I always get braver with each project, maybe I'll even try a top next!

Wednesday, June 20, 2012

Oliver + S Ice Cream Dress Review

Nothing like starting a new blog and then not posting anything for a few days!  Sorry!  I have this bad habit of completely neglecting everything but my children when I am reading a book.  I just finished The Dovekeepers by Alice Hoffman last night so hopefully I can return to the real world for at least a few days.  (I do have another book from the library here waiting to be read so we'll see.)


The dress I wanted to talk about today is the Ice Cream dress from Oliver + S.  This is the first pattern of theirs that I have sewn.  I don't know why but I thought they seemed to fancy and hard to sew.  But I was wrong!  This dress came together easily and looks quite cute.  I got the idea for my fabric choices and style from this dress.  I did put the pockets on my dress, which I thought would add to the dress, and she likes to put her hands in pockets.


I did choose to blend them into the dress by keeping the fabric the same in the dress bottom as pockets. You can hardly see them!  Peyton has worn this quite a bit and even wore it for preschool graduation last month.  Also what I like about this style of dress is that it can be a tunic eventually too. The pattern does have marking for sewing a tunic, but I like to sew up a dress first and then someday it can be a tunic! :)


The only thing I am not crazy about is the button closure in the back, while this does make the dress easy to sew (and is the first one I've done.) my daughter's long hair gets really tangled up in it!  That being said I still hope to sew more dresses from this pattern and more patterns from Oliver + S.


 Thanks for visiting! :)

Thursday, June 14, 2012

Lace Top Inspiration

I always like finding a deal and this top on the clearance rack at Old Navy was calling out to me!  I think I paid about $4 for it.  I loved the lace and thought Peyton would like it too.


As I looked at it more I thought, hey I could make that! It is just lace sewn down on a tank.  I did notice that one row was flat and the next was ruffled so I kept with that since it seemed to add texture. With my basic tee pattern off I went.  


I think it turned out pretty well for totally winging it!  I would use a different lace next time and might put it on a tank or dress but wanted to try it on a tee-shirt.  


What a little poser! Down below is how we get the most use from our weekly Penny Saver paper.  Peyton and Carter (took off before I got the picture since Dad came home) happily tore it up for at least 20 minutes providing me with a small break!  What kind of odd activities do you think up for your kids?


Friday, June 8, 2012

Lil Blue Boo Sienna Dress


Lil Blue Boo has some great patterns and a fun blog to follow!  I have made a few dresses from her Sienna dress pattern and this is the latest one.  I took an XL shirt from the clearance rack at Old Navy and turned it into a dress.  The dress comes together very quickly and can be constructed with out a serger easily.  I left the bottom ruffle with the raw edge and since I used a t-shirt I didn't have to hem the sleeves either!  Quick, cute, and great for play!  (Excuse the sunspots in her picture) I'm working on my photo skills! :)


Here is another Lil Boo Sienna dress made last summer.  


Thursday, June 7, 2012

Strawberries

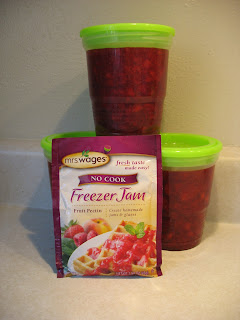
It is strawberry season here in Iowa and my in-laws have plenty!  I have processed plenty of strawberries since coming into the family.  I've frozen them plain on cookie sheets to cook with later andI've done them in syrup for ice cream or my favorite use margaritas!  Recently though I've most made freeze jam with them since my husband eats peanut butter and jelly everyday for work, and my daughter eats the same most days at lunch too.    I thought I'd walk you through the process.  I like to use the packets for freezer jam like the one pictured below, mostly because it is EASY.  The directions say you need 4 cups crushed and I find that is about 6 cups pre-crushed!  I do measure after they are crushed but it helps me know how many to cut up for each batch.
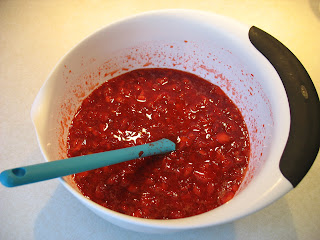


Here is the crushing process, yes, it is that messy.  


I am missing a picture but it is pretty basic.  In the bowl before you add the crushed strawberries you add the contents of the packet and 1 and a half cups sugar and mix together.  Then add your strawberries and stir for 3 minutes.  


 Then you ladle it into jars.  I like the Ball freezer jars.  But I've used glad plastic containers too.  


I always have help around to make sure things are going well!


And here are fruits of my labor, 10 pint jars of fabulous tasting strawberry for all those sandwiches I make!


I also wanted to mention that last year I discovered a recipe for strawberry sauce that is AMAZING too!  We use it on waffles, pancakes and ice cream. It is so easy, just 2 cups of strawberry, 1/3 c. sugar and 1 tsp. of almond extract. (do use almond extract, I tried it with vanilla and it is much better with almond).  Here is the blog where I found it, Our Best Bites, they have lots of great recipes so check it out! 

Wednesday, June 6, 2012

Ruffle Skirt Pattern Review


Another pattern review, this one is the Nie Nie skirt by Pink Fig.  I choose the fabrics for this skirt by starting with this fabric from Joel Dewberry's original Aviary line.  (It has been sitting in my stash for awhile)


 I thought the pattern ran true to size and was easy to follow.  The most tedious part was all the ruffling!  Also having my serger made it MUCH faster to hem all those ruffles.  It make a pretty heavy skirt with around 4 yards of fabric needed, and with needing that much fabric it wasn't the cheapest either, but it is Adorable!  I think will fit for at least a year or more so she'll wear it lots.   


 Still a little uneasy about all the modeling she has in her future for this blog. :)  Thanks for stopping by!

Tuesday, June 5, 2012

Envelope Tee Review

I recently purchased Growing up Sew Liberated by Meg McElwee.  This is a fun book with some good clothing patterns and some play/dress up things too.  I was anxious to try this pattern out and it turned out great.  I made the 18-24 mo. size thinking it would be a bit big for my 10 month old guy.  (He's 31" and 21 lbs) Unfortunately it was way too big for him.  I am guessing he could wear the 6-12 month size and just lengthen the pattern a bit.  I do always err larger than smaller when first making something.  They can always wear it later rather than never! :)  The fabric was from Hancock's Fabric.  I think there might be enough left to make one in the correct size for him.  :)  I'll be making more of these for sure, easy and cute!